
HYPER-V
Method 1: Disable in Windows 10 & 11 in Control Panel
Click Start, type Control Panel, and open it. Press Win+R. In the Run field, type appwiz.cpl and press Enter.
In the Control Panel window, click Turn Windows features on or off.
In the Windows Features window that opens, deselect the Hyper-V checkbox. Make sure that checkboxes in Hyper-V subfolders are deselected.

Locate and deselect Virtual Machine Platform and Windows Hypervisor Platform.
Hit OK to save settings and start the Hyper-V uninstallation process.
Click Restart now to restart your computer to finish the process and uninstall Hyper-V.
Method 2: via Command Prompt
You can uninstall Hyper-V in the command line interface (CLI) just as with the previous method in the graphical user interface (GUI). This workflow works in both Windows 10 and Windows 11.
Check the Hyper-V installation status in the command line before you start to uninstall Hyper-V and to make sure that this hypervisor has been removed from your Windows system after you have uninstalled Hyper-V.
Open the command line (CMD) as administrator. Open the Windows Start menu, type cmd, right-click the cmd entry, and click Run as administrator.
Run
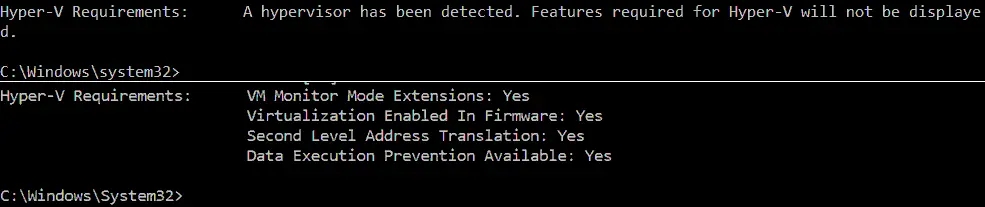
systeminfoto check whether Hyper-V is installed.If Hyper-V is not installed, in the Hyper-V requirements section, you see the names of the technologies required to install Hyper-V and the status of their availability on the machine.
If Hyper-V is installed, you should see the following message in the Hyper-V Requirements line: A hypervisor has been detected. Features required for Hyper-V will not be displayed.
Checking the Hyper-V installation status in Windows As an alternative, you can run
msinfo32.exeto check whether Hyper-V is uninstalled in the GUI. The needed information is located in the System Summary section at the bottom of the item list.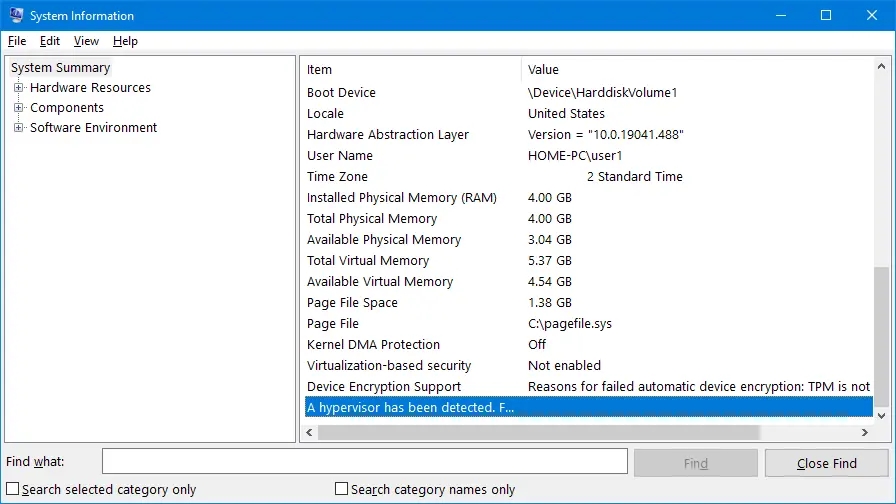
Hyper-V is installed in Windows Now, once you have verified that Hyper-V is installed, you can uninstall Hyper-V in Windows 10 by using the command line.
Open PowerShell with administrative privileges (type PowerShell in the Start menu, right-click PowerShell, and click Run as administrator just as you do to run CMD).
Run the following command to remove the Hyper-V feature from Windows 10:
Disable-WindowsOptionalFeature -Online -FeatureName Microsoft-Hyper-V-All
Hyper-V Windows 10 uninstallation in PowerShell Do you want to restart the computer to complete this operation now?
Type Y and hit Enter.
Restart is required after executing this command. You can type N (No) and restart Windows manually.
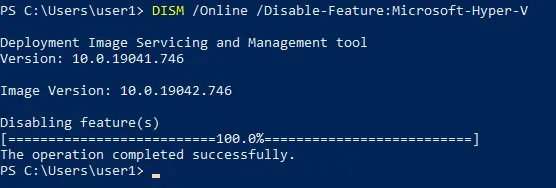
Method 3: via DISM
DISM (Deployment Image Servicing and Management) is a tool for working with Windows images (.wim files) and installing/uninstalling Windows drivers, features, and packages.
Open PowerShell with administrative privileges, and run this command to disable Hyper-V:
You may need to disable Secure Boot in UEFI/BIOS settings of a computer to finish the uninstallation process and uninstall Hyper-V. The sequence to disable Secure Boot depends on your hardware vendor and differs for different motherboard vendors and models.
Last updated